当拥有自己的VPS和NAS之后,就一直想着能够远程连接家里的NAS,考虑到使用服务器中转的方式,需要消耗VPS的大量带宽,因此考虑使用P2P的方案。
前情提要
VPS Ubuntu24.04 LTS VPS 拥有公网IP 拥有自己的域名(这里使用mr-h.org举例)
P2P 服务器选择
选择P2P内网穿透时,听到最多的无非就2个:tailscale和zerotier。考虑到自己拥有VPS,因此想使用不限制设备数,以及使用根服务器的方案。
因为听信了chatgpt的鬼话,说zerotier支持自建行星服务器和不限制设备。按照chatgpt的方法搭建到后期,发现zerotier早就停止了行星服务器的开源;目前只能创建moom服务器,也就是一个加速服务器,且也有10台设备限制。冲钱可以增加几台设备,但是好像很贵的样子。
最后选择了headscale作为P2P服务端。headscale,是欧盟某个航天研究院因为不满tailscale根服务器闭源,自己重新实现的。headscale得到了tailscale的支持,tailscale客户端和headscale兼容。没有设备限制。简直太完美了
VPS安装headscale
- 前往headscale github下载对应版本 https://github.com/juanfont/headscale/tags 我这里选择 headscale_0.24.3_linux_amd64.deb 下载
- 安装 headscale_0.24.3_linux_amd64.deb
1 | sudo dpkg -i headscale_0.24.3_linux_amd64.deb |
- 设置headscale开机自动启动
1 | sudo systemctl enable headscale |
- 修改/etc/headscale/config.yaml
.(注意:server_url是配合tailscale客户端使用的,当客户端连接服务器时,会得到这个链接,然后访问这个链接进行注册,因此这个server_url需要和nginx headscale配置的监听域名和端口一致。且我这里使用的是htts访问,如果不愿意折腾证书,可以改为http访问;即http://p2p.mr-h.org:80)
1 | server_url: https://p2p.mr-h.org:443 |
- headscale 本地监听端口为8080;如果有和其他服务冲突,可以修改/etc/headscale/config.yaml里面的headscale本地监听的地址。如下。
(注意:这个端口需要和Nginx反向代理配置的地址和端口一致)
1 | listen_addr: 127.0.0.1:8080#例如可以修改为8081 |
VPS安装headscale web ui
- 前往headscale web ui下载对应版本 https://github.com/gurucomputing/headscale-ui/tags
- 我这里选择25.01.20的版本,把.zip下载下来 https://github.com/gurucomputing/headscale-ui/releases/tag/2025.01.20
- 将headscale-ui解压到指定文件夹文件夹。
(注意解压的地址尽量就选在/var/www)
1 | sudo unzip -d /var/www headscale-ui.zip |
配置web服务器,我这里使用的是nginx
- 进入nginx配置
1 | cd /etc/nginx/sites-available |
- 增加一个headscale的配置,下面贴出我的配置。
(注意:1.需要根据根据自己的二级域名填写,根据自己headscale端口填写。2.我这里使用的有使用到https协议,需要证书,证书申请请看搜索另外一篇博客:how to generate https-certificate)/spna>
1 | map $http_upgrade $connection_upgrade { |
- 将配置软链接到/etc/nginx/sites-enabled
1 | sudo ln -s /etc/nginx/sites-available/headscale /etc/nginx/sites-enable |
- 测试,重载,重启nginx服务
1 | sudo nginx -t |
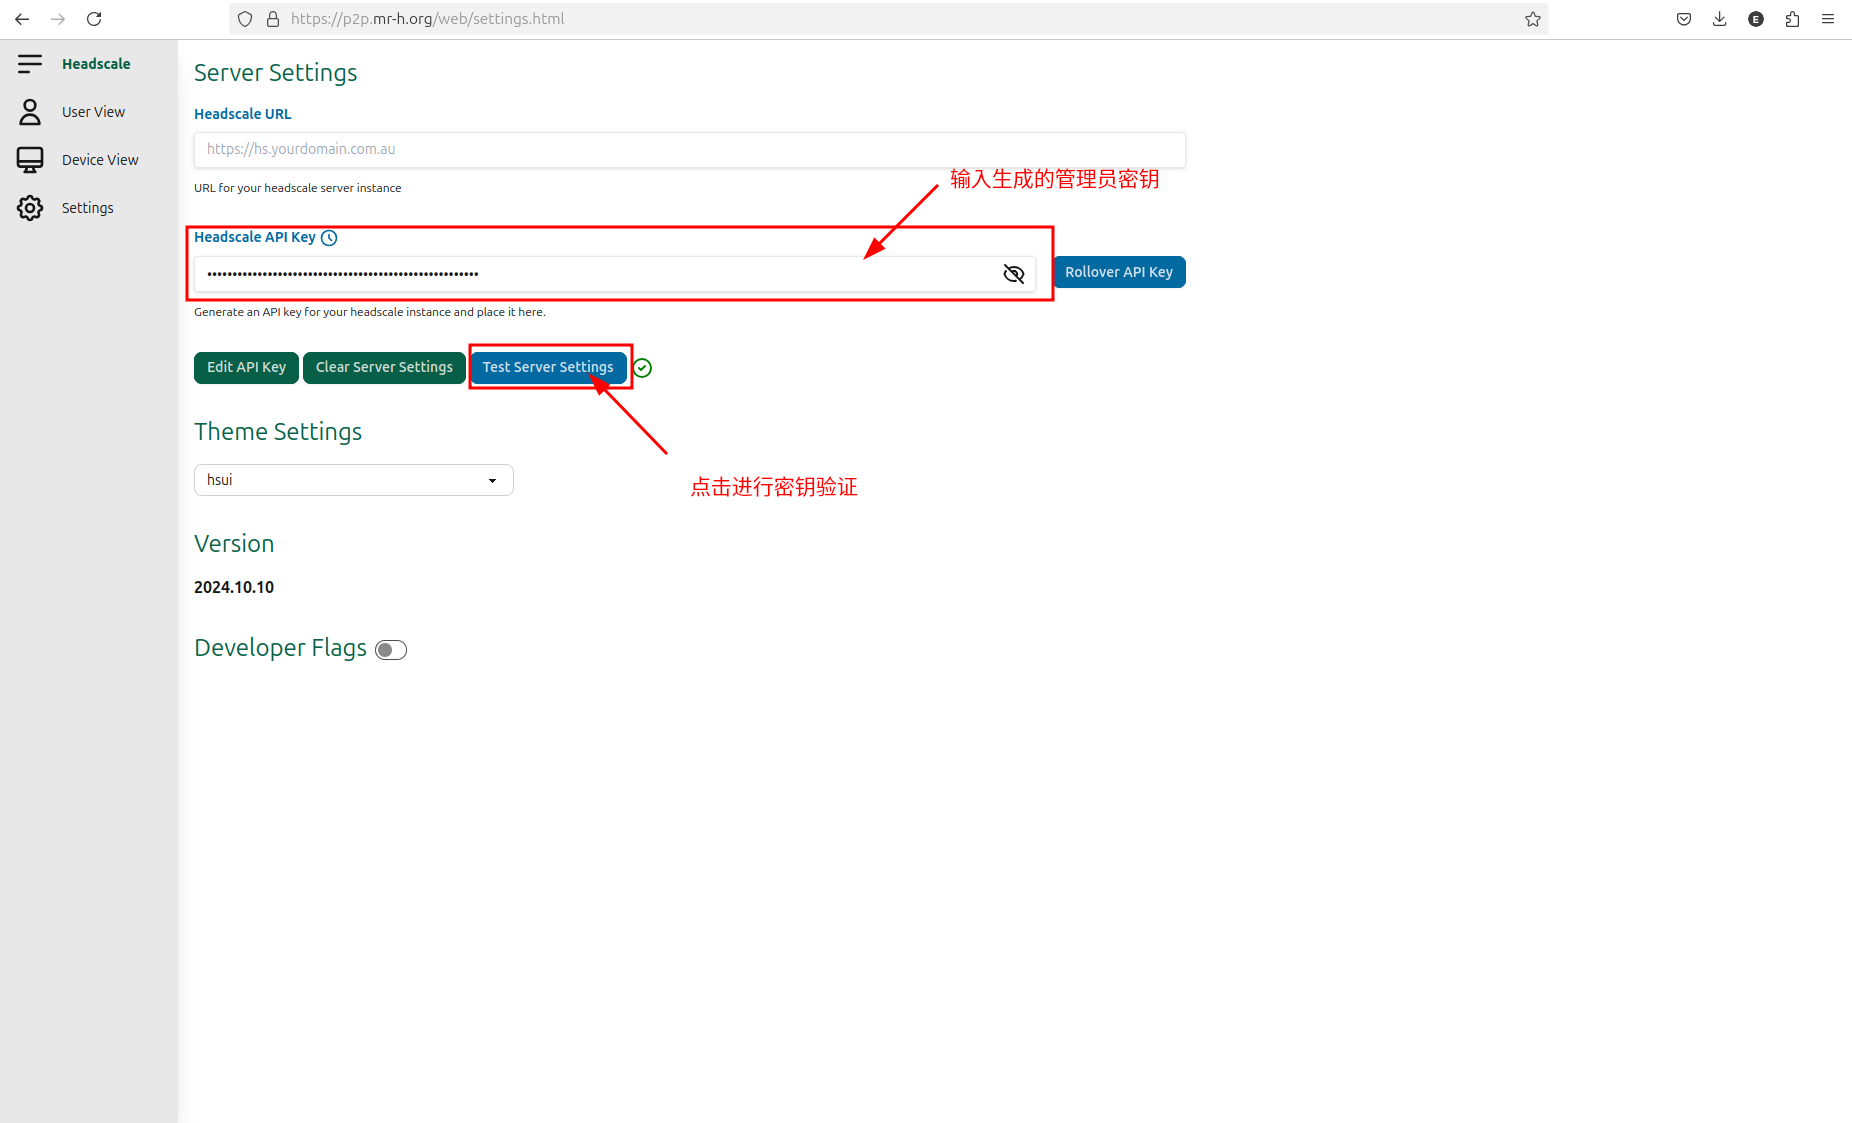
登录headscale后台进行管理,在浏览器上输入http://p2p.mr-h.org/web 进入setting界面
在bash输入命令生成密钥,用于对web端进行授权
1 | headscale apikeys create --expiration 9999d |
- 在web ui -> setting -> Headscale API Key 界面粘贴密钥进行授权
下载个平台客户端
- windows访问 https://tailscale.com/download/windows 直接下载安装包
- linux访问 https://tailscale.com/download/linux 在终端运行安装脚本
1 | curl -fsSL https://tailscale.com/install.sh | sh |
- andriod访问 https://tailscale.com/download/android 如果没有谷歌商店,也可以在浏览器上搜索tailscale.apk
在linux 或 windows上使用tailscale,并链接到自建服务的局域网中
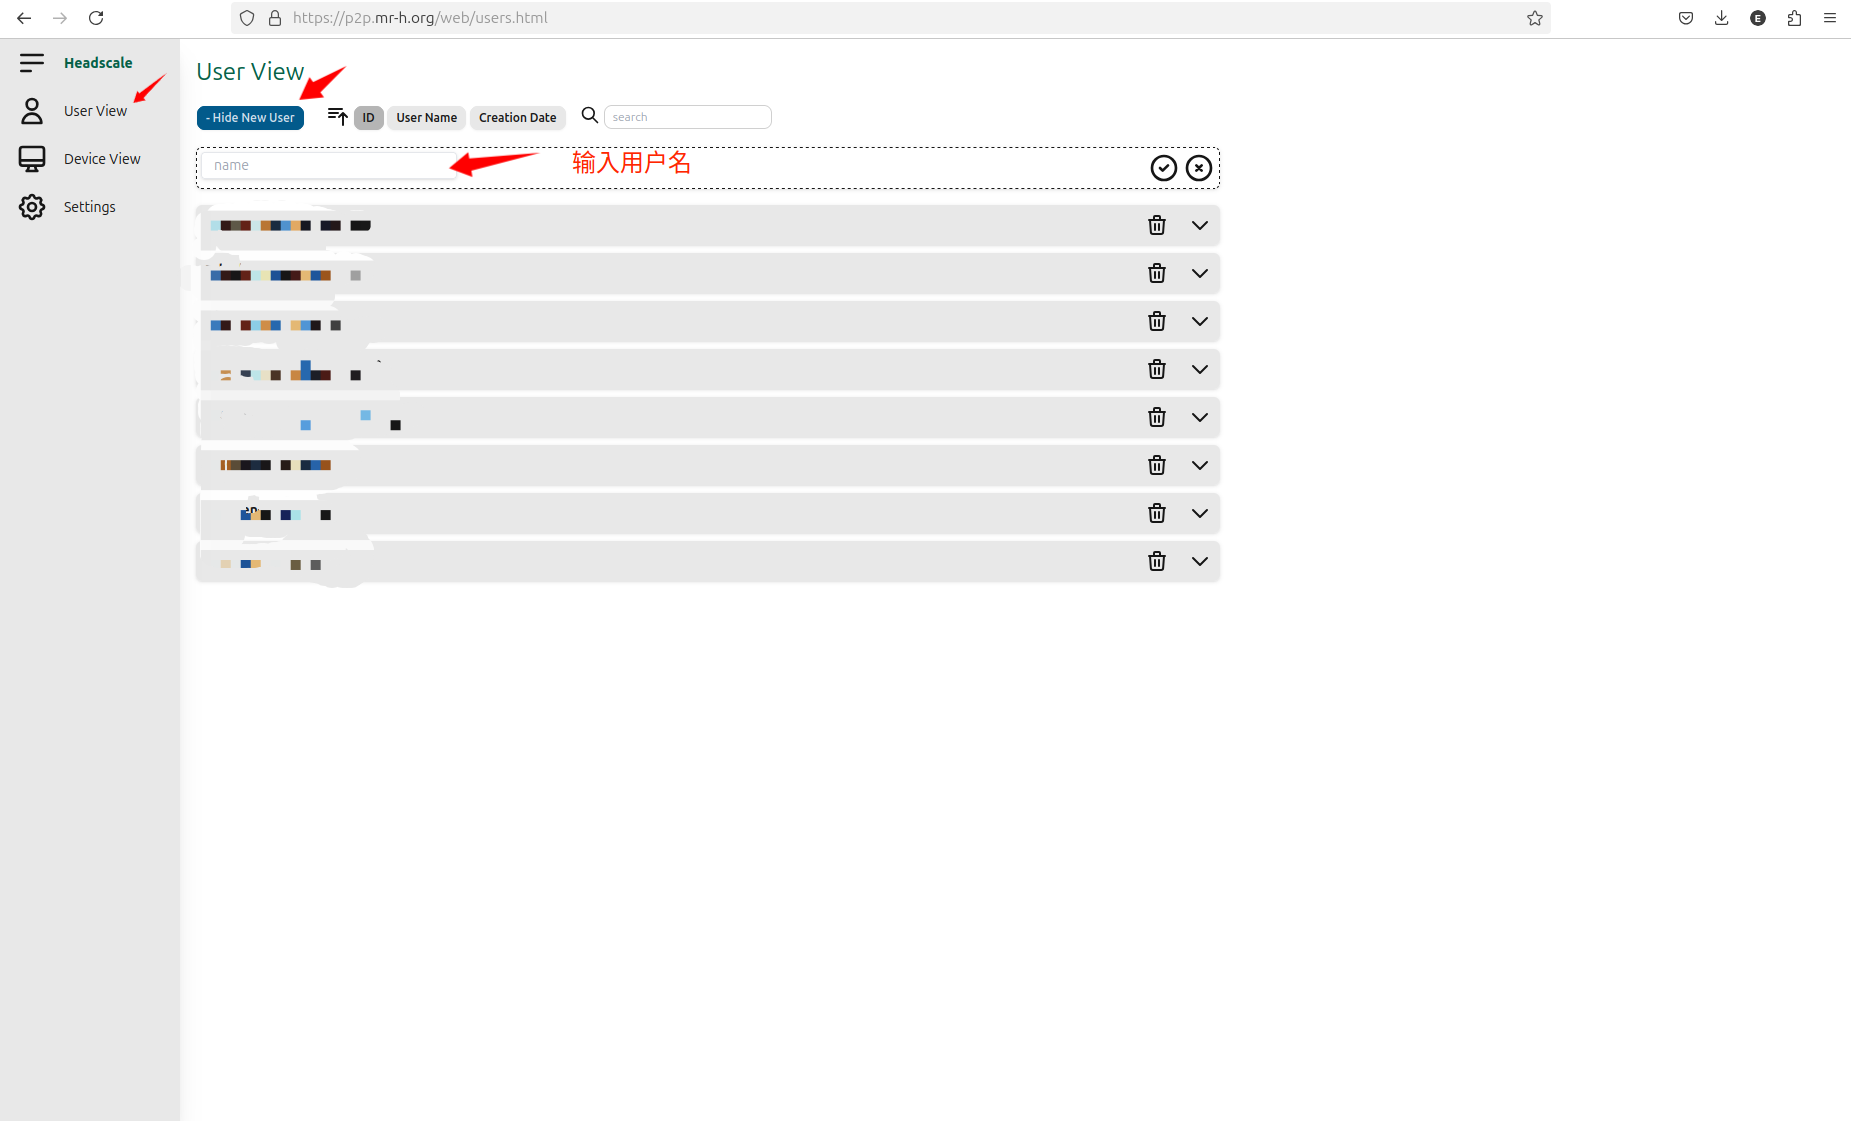
浏览器访问http://p2p.mr-h.org/web 进入User View 点击 New User,创新新用户
安装好tailscale客户端后,打开终端,输入命令进行注册,命令会请求到一个key。
(注意填写自己的域名)
1 | tailscale login --login-server=http://p2p.mr-h.org |
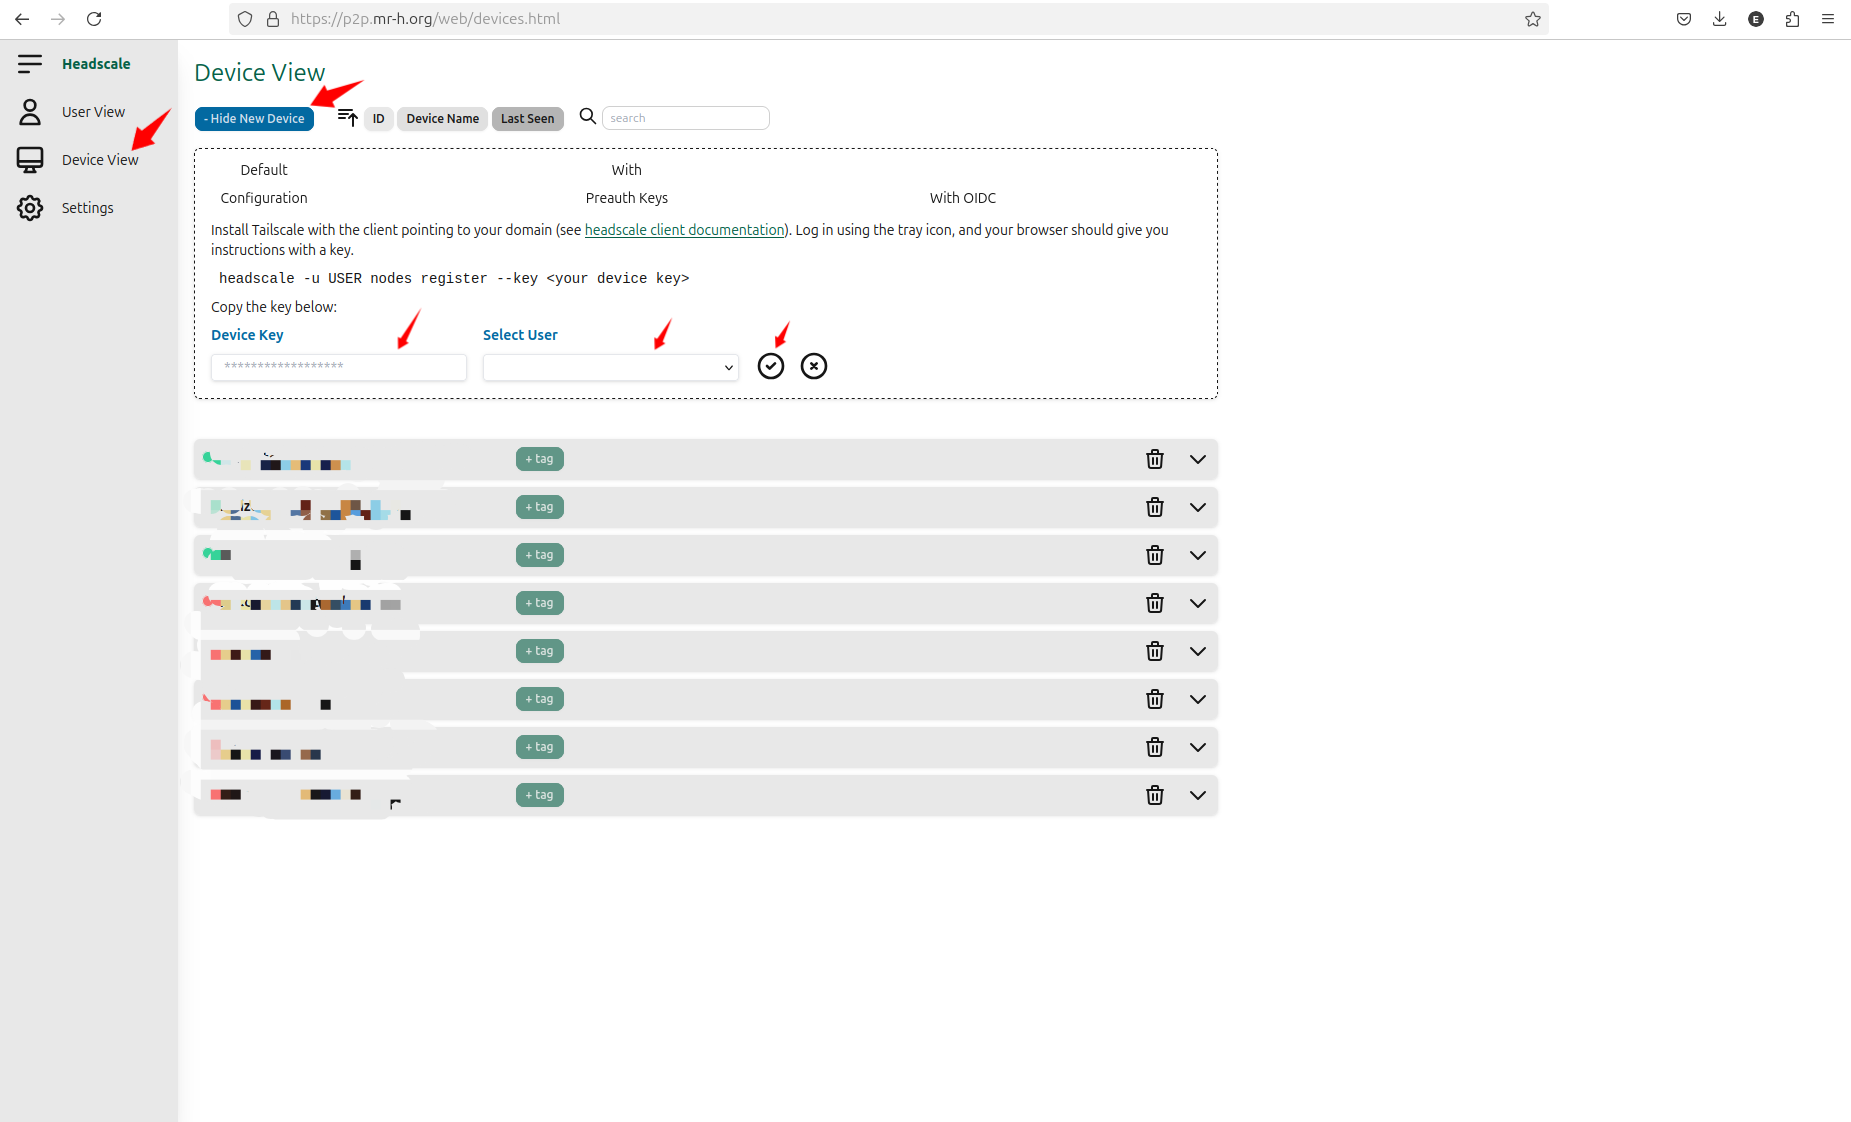
复制请求到的key,回到浏览器http://p2p.mr-h.org/web 进入Device View–>New Device–>将刚才的key输入到Device Key中–>Select User中选中前面创建的用户–>点击勾。
最后终端上会出现注册成功的提示,整体输入输出情况如下
1 |